2023
-

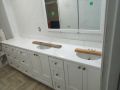
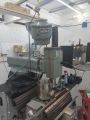
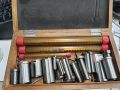
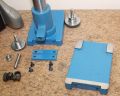
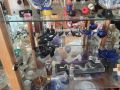
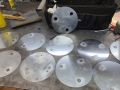
1: Clinton Street Bay window apartment
-
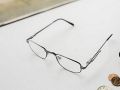
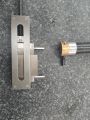
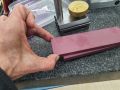
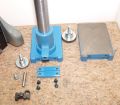
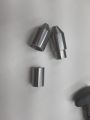
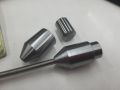
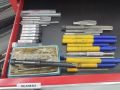
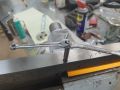
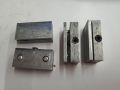
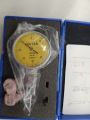
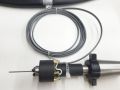
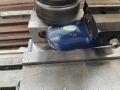
2: Glasses with pocket clip
-
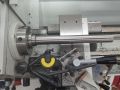
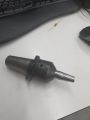
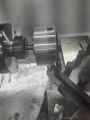
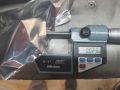
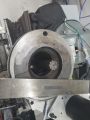
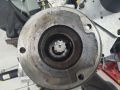
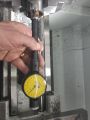
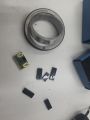
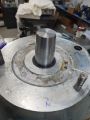
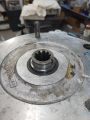
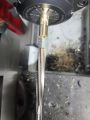
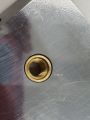
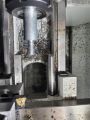
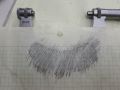
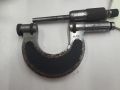
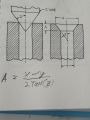
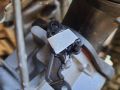
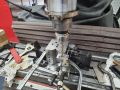
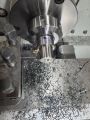
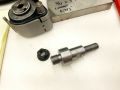
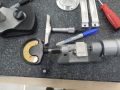
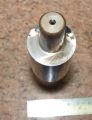
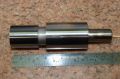
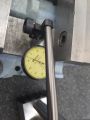
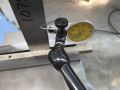
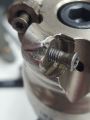
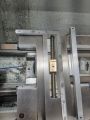
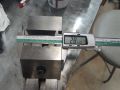
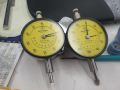
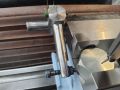
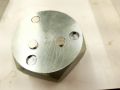
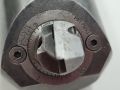
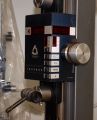
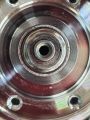
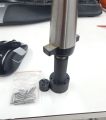
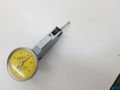
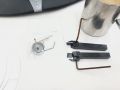
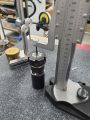
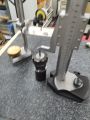
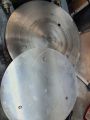
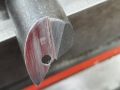
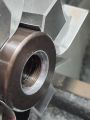
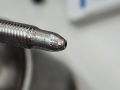
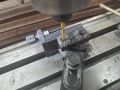
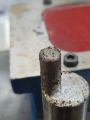
3: +/- 10um run out
-
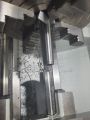
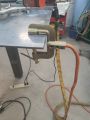
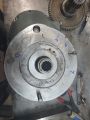
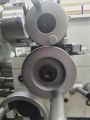
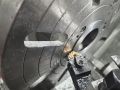
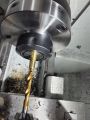
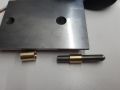
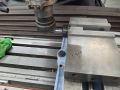
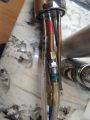
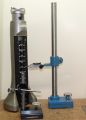
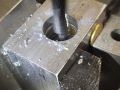
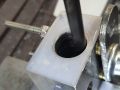
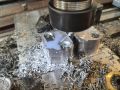
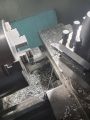
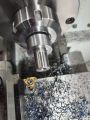
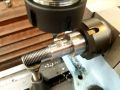
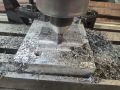
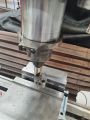
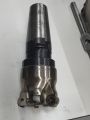
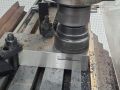
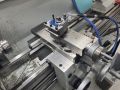
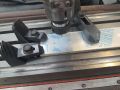
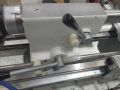
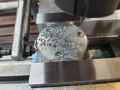
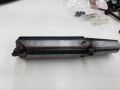
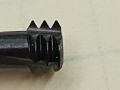
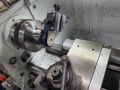
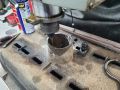
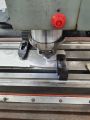
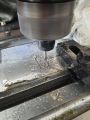
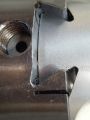
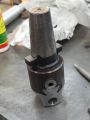
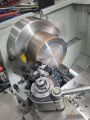
4: Trimming the MT3
-
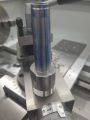
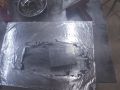
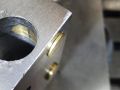
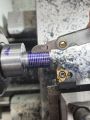
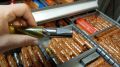
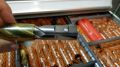
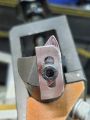
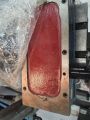
5: Inks up OK
-
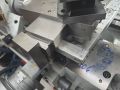
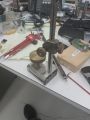
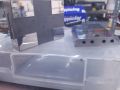
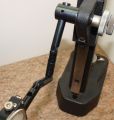
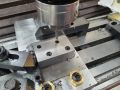
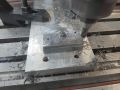
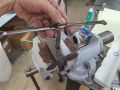
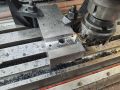
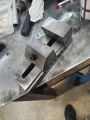
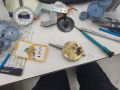
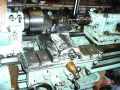
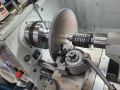
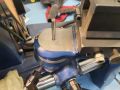
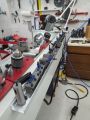
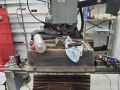
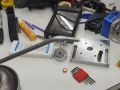
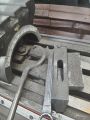
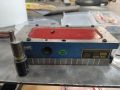
6: Very fiddly setup to set the compound.
-
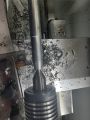
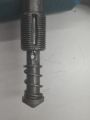
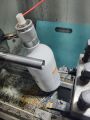
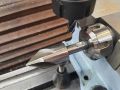
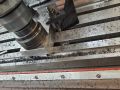
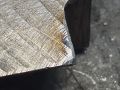
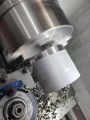
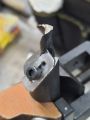
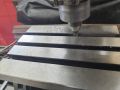
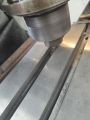
7: Turning taper, but nasty finish - I think I really need to be able to adjust the height.
-
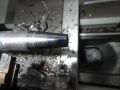
8: don't like the finish, but it did blue up OK
-
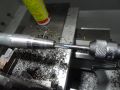
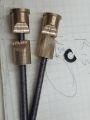
9: Need better tap holders and this tap is not so sharp.
-
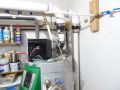
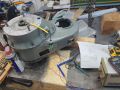
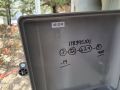
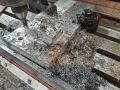
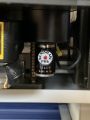
10: Water heater desinged by sadists - no clearance - had to spend 50min disassembling to change out the anode.
-
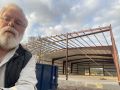
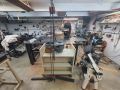
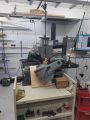
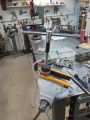
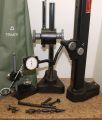
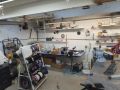
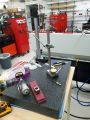
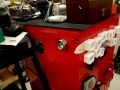
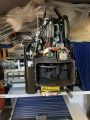
11: Tim's new shop progress
-
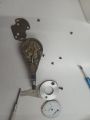
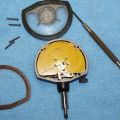
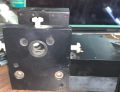
12: Fixed this only to realize I can't find the crystal
-

13: Fixed this only to realize I can't find the crystal
-

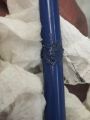
14: Blue on the entire taper - not easy. I can't trust the flats on the lathe.
-

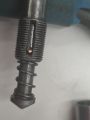
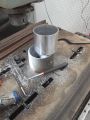
15: Alsmot finished - just need to cut a flat on it.
-
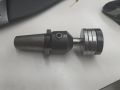
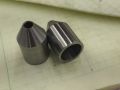
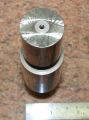
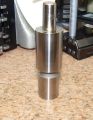
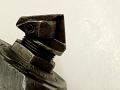
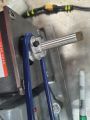
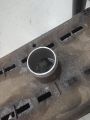
16: Nice snug fit in the tool holder - figured out the finish problem at the end of my efforts.
-
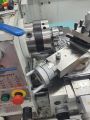
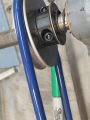
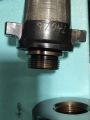
17: Taper grabs the wheel arbor.
-
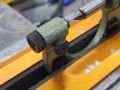
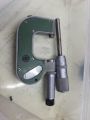
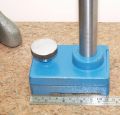
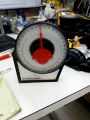
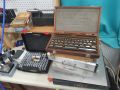
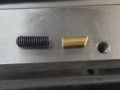
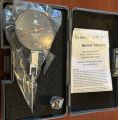
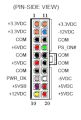
18: Starrett 91
Single sided pin - very hard to remove
-
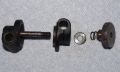
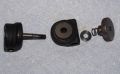
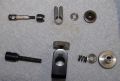
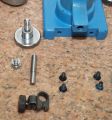
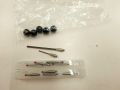
19: Replaced with some copper wire.
Needed to dissasemble to regrind the seat that holds the tap.
-
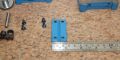
20: 2023-01-12_20-03-01.jpg
-
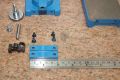
21: 2023-01-13_13-01-55.jpg
-
22: 2023-01-13_13-26-22.jpg
-
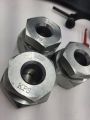
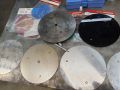
23: AC4 diamond powder (Venev diamonds) - grain size from 2500 to 40 microns.-- 80-100um or 140-170grit
-

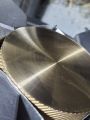
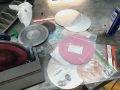
24: This did not work well - ended up chipping the disk
-
25: This worked much better
-
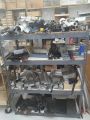
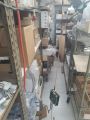
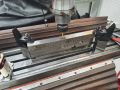
26: Material shelf needs to be reoganized.
-
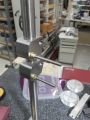
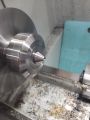
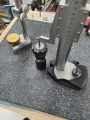
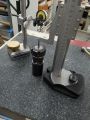
27: Truing up a grinding cup using the tapered arbor I made.
-
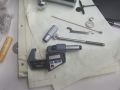
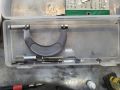
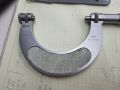
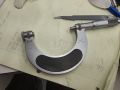
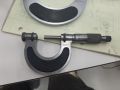
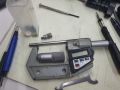
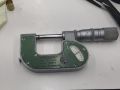
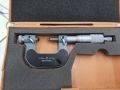
28: Fixing my micrometer that I dropped .
Reminder - never drop instruments!
-
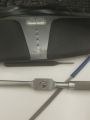
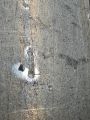
29: They don't use sink hangers anymore. They apply silicone caulk/glue and then twist the wires to clamp it into place.
-
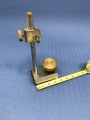
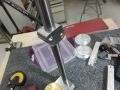
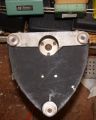
30: Before restoration - A Herman Schmidt/Murkens style Suface-plate-indicator-stand.
-
31: 2023-01-18_00-52-40.jpeg
-
32: Lapping block to brighten it up.
Groved iron plate with polycarbonate sheet - 20um diamond paste.
-
33: Had to weld this Stainless back together..
-
34: A good ground clamp
-
35: Trying aluminum foil on groved plate.
Does not wear long - too thin.
-
36: Only 23um [.0009"\
-
37: lapped down to 2.5um
-
38: Finished printing the ER40 collet holders.
-
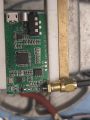
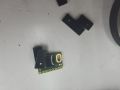
39: Added RF connector to FM transmitter
-
40: Connected to RF power amp
-
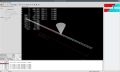
41: Tool path.
-
42: 2023-01-25_20-50-01.jpg
-
43: Screwed up - cut a bit deep into the aluminum, probably just as well - don't want to cut the 1095 spring-steel with the corner.
-
44: 2023-01-25_20-55-59.jpg
-
45: got close enough to the screw head to make me nervous.
-
46: Clearance is clearance..
-
47: Much better
-
48: Waiting for the 80TPI screw.
-
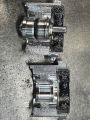
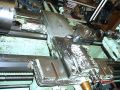
49: Some of what came out of the BRAND-NEW Precision-Mathews lathe transmission.
-
50: Once again
-
51: Moving to big bench
-
52: OK - found my good parrellel ( flat on all sides unlike my other ones)
It Rocks!!! I think I finaaly figgured out my problem.
-
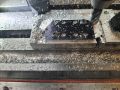
53: Bottom of the oil sump - wide band of flat - -.002" measured on the surface plate. (not the main problem)
-
54: Top of the spindle - dashed lines show the edge of the wide flat on the oil pan. High places on the left - someone ground them down - but not enough.
-
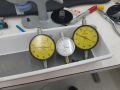
55: Setting bore gauge
-
56: Pretty close for an amature
-
57: Another project - the handles are too big.
-
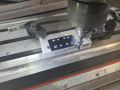
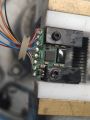
58: Z encoder - made plastic blocks to keep expoxy out of the screw holes.
-
59: spindle read head - making blocks to keep epoxy out of the screw-holes
-

60: Junyi - cheng/ shuo\ and Aloon
-

61: Junyi - cheng/ shuo\ and Aloon
-

62: Junyi - cheng/ shuo\ and Aloon
-
63: Bad DRO - the Axis should be Z and X
No way to fix.
-
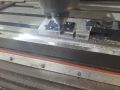
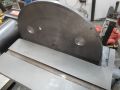
64: Glued disk to faceplate - thinning to target to set the play in the mill's transmission's main shaft stack-up
-
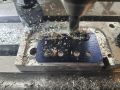
65: Read head with teflon wires installed.
-
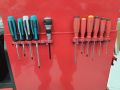
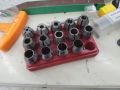
66: Printed some tool holders that I mounted on the side of a tool-cabinet. The ones that came with the red ones had slots instead of holes - eveytime I walked by, one would fall on the floor..
-
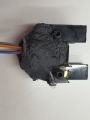
67: Read head - Epoxy coated
-
68: Had to make a special tool to install the Teflon seal
-
69: Seal installed - The slot to the right is where the sensor head wires will go out.
-
70: Seal installed.
-
71: 3D printed tray that fits in the tool cabinet.
-
72: This was problematic. the bar helped me scoot it into place. But I had to drill the holes on the oil pan one size bigger. I added hardened washers - without the washers it would move out of place as I tightened it. My take is the oil pan should have been matching cast iron and pinned.
-

73: Can't find trays that are low enough for these drawers.
-
74: Testing new spindle encoder.
-
75: Headless mills look strange
-
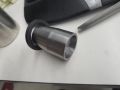
76: Making bushing to mount 80TPI screw in indicator stand.
-
77: reaming for exact fit. ( I got the 5/16" reamer from a $20 ebay tool lot - best deal I ever got - lots of treasures).
-
78: Top plate - finished bushing and 80TPI adjustment screw assembly.
-
79: Bushing and insert installed.
-
80: Lots of trouble removing the original dowel pin. Bored it out oversized (10.27mm) - plugged it - skim cut.
-

81: Put a jog-wheel divit in the knob
-
82: Fiber install
-
83: Turned a thread - Timing is hard..
-
84: For the real deal I'm not going to thread it after all - tapping for the grub screw
-
85: Making a hex head for tightening the larger stand.
-

86: Needs a bit of file work.
-

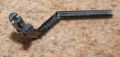
87: Need to make a new joint now.
-
88: Looking at this old broach set - I can use it to make the indicator joint.
-
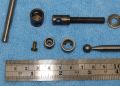
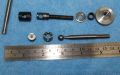
89: All disassembled and cleaned.
-
90: Transfering the shape
-
91: Close enough
-
92: Adhesive backed Neoprime makes it look good.
-
93: Before
-
94: After
-
95: Checking micrometer anvil with sodium lamp
-
96: All cleaned - ready to paint - but can't find the paint
-
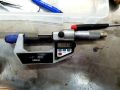
97: PAV thread micrometer
Base anvil has a very good clamp mechanisim.
Not sure why the fancy locking screw on the end?
-

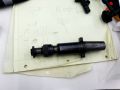
98: PAV thread mic
The base anvil locking screw.
Similar to a bridgeport quill lock snug.
-
99: Starrett sytle twin-slit-snug joint
You can see a tapered bit where the snugs mate here - which tightens first - the slits of the piviot?
-
100: Starrett sytle twin-slit-snug joint
-
101: Starrett bits
OK - on the top - the cone bit has a V-block like bit to hold the horizontal indicator rod.
On the bottom - a main post keyway-snug
The bit to hold the horizontal rod is not a cone - I think uses a sleave?
-
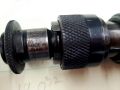
102: Cone-sleave snug
-
103: Bridgeport quill lock - double snug.
-
104: Snugs
-
105: Upper left - one and two over - Starrett style sleeve snug
-
106: Swiss style articulated arm.
-
107: Art's stands and arms -
-
108: Swiss style articulated arm.
triple tongue joints.
⌀9.5mm
-
109: Swiss style articulated arm.
-

110: Interesting swivel dovetail.Brown & Sharpe Universal dovetail holder P/N 599-7054
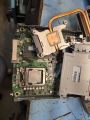
-
111: All cleaned, lubed and restored.
-
112: BILZ tap holder - size '1'
-
113: Not sure why I have no memory of buying this????
-
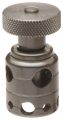
114: Starrett 57S Universal Snug
-
115: One more to clean and lube.
5 - 7 - 0 need ink
-
116: This got part of the numbers re-inked. Inside is a mess to reassemble..
-
117: Faster than doing CAD
-

118: Tim in front of Christiaan Huyghens house just now..
Remember reading about it in the biography.
-
119: nightmare hot water faucet..
-
120: sliding part of the snugs
-

121: Fixing undersink water heater. If they had used high-temp materials it wouldn't have failed.
Replaced the black gasket with food-grade RTV.
-
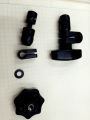
122: Snug parts finished - will remove the end lip after the grove is machined.
-

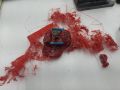
123: lawn mower quit
-
124: 2023-04-02_15-27-36_1.jpg
-
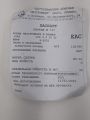
125: Part number off carburetor ..
-
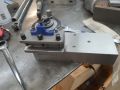
126: Using shim Art gave me - Aluminum didn't have a side that didn't rock.
-
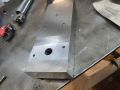
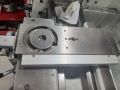
127: Sacrificial plate flat and with 2 - 1/2-13 holes to hold eccentric clamps. Almost ready to mill joint bodies out of some 4140..
-
128: Boring head had broken slot washer.
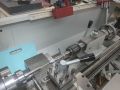
-
129: Made a new one.
-
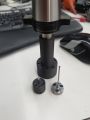
130: Precision ground Ruby stones - wringing -
-
131: broken plastic choke lever
-
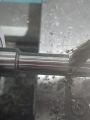
132: Boring snug holes to size.
-
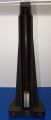
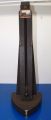
133: Art's indicator stand with 1" hollow colum.
-
134: Art's indicator stand with 1" hollow colum.
-

135: Art's indicator stand with 1" hollow colum.
-
136: Art's indicator stand with 1" hollow colum.
-
137: Art's indicator stand with 1" hollow colum.
-
138: Art's indicator stand with 1" hollow colum.
-
139: Art's indicator stand with 1" hollow colum.
-
140: Art's indicator stand with 1" hollow colum.
-
141: Not a good setup.. Learned a lesson here.
-
142: Tried to bore to size.
-
143: Boring failed as the hole got larger
-
144: Ended up using just a drill bit.
-
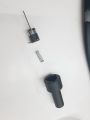
145: Snubs turned out well.
-

146: Printing MT3 din-rail holder for the lathe.
-
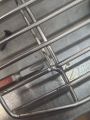
147: Dereeling set up for the wire-cut/strip machine.
I use a torid inductor as a damping weight - then the wire goes over a spool the is supported by elastic cords.
The motion of the wire is jerky - would jam or tangle - this works.
-
148: 3d Printed a holder for my Double-taper Y collets.
-
149: Finally doing the profiling on the indicator stand joint
-
150: 2023-04-14_21-52-23.jpg
-
151: 2023-04-14_22-29-38.jpg
-
152: Just need to flip it over and shave off the bottom..
-
153: Snugs are finished.
Nice positive action.
-
154: Next - need to make knobs.
-
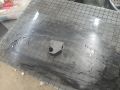
155: Super close up of a ding on the milling machine table. You can see the shinny bit the PGS left.
-
156: Making the sleeve for the joint.
-
157: Not much room for turning the cone.
-
158: The cone end finished
-
159: Sleves finished turning. Will drill the cross holes later.
-
160: A 3D print went very bad..
-
161: Starting tap
-
162: 2023-04-23_17-30-49.jpg
-
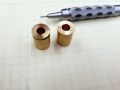
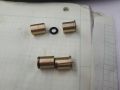
163: Sleevs and barrels
-
164: Sleevs and barrels
-
165: 2023-04-23_22-49-28.jpg
-
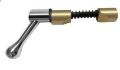
166: Joint finshed..
I like shallow knurling.. Need a bigger 60° countersink..
-
167: Level that Danny fished out of the trash for me!
-
168: Measuring to find the center height.
-
169: Original tool post to make CAD model
-
170: Measuring perpendicular - seems to fiddly
-

171: CAD work for tool post.
-
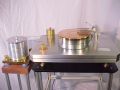
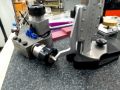
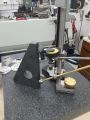
172: Mikes recordplayer - air bearing - liquid damping.
-
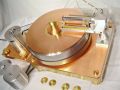
173: Mikes recordplayer - air bearing - liquid damping.
-
174: Mikes recordplayer - air bearing - liquid damping.
-
175: 2023-05-05_12-47-31.jpg
-
176: Tool post work - managed to break all three tips..
Turns out I have to 'rewind' the lathe for metric threads..
The good news is Amazon has them - will be here tomorrow..
-

177: Chinese levels - cheap and very good
-
178: 2023-05-07_21-02-46.jpg
-
179: 2023-05-07_21-57-17.jpg
-
180: Should have gotten a CNC lathe..
-
181: fits like a piston
-
182: Cutting wrench flats
-
183: 2023-05-08_16-03-46.jpg
-
184: Got out the good gauge blocks today.
-
185: I think the anvils on this are too small?
-
186: Shiny stainless M5-0.8
-
187: All cleaned and Treated with boeshield.
-
188: Art's Gauge plug
-
189: Art's Gauge plug
-
190: Art's Gauge plug
-
191: Art's Gauge plug
-
192: Profiling the T-nut
-
193: Cutting
-
194: 2023-05-13_21-08-45.jpg
-
195: Kurt vice on the surface plate - about 10um low on one side.
-
196: Cutting a flat
-
197: Final cut on the indicator joint using the 60° cutter Art gave me..<smile>
-
198: Tapping without a tap holder
-
199: 2023-05-18_20-41-31.jpg
-
200: This moves too much?
-

201: I put the insert number on this mill head with the engraver Art gave me..
-
202: It has a big chip out of it that wasn't in the picture when I bought it.. I will weld some nickle into it and use the so-grinder to match it up..
-
203: TIG work
-
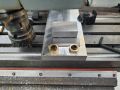
204: Matching the T-nut up with the compound.
-
205: Getting close
-
206: Slow feed rate for nice finish..
-
207: the Top wasn't perfectly flat - took off 10um to make it better..
-
208: Finnaly a tool holder that adjusts for height.
-
209: Dissasembly for installing cross-slide lock
-
210: Dissasembly for installing cross-slide lock
-
211: Documenting incase I want to try to install a ball-screw
-
212: Cast iron drills so easy.
-
213: Grub pushes on brass to lock slide.
-
214: This corner of a gib was high - you can see the polish from the PGS - these high spots can then be filed with a very fine file. The discoloration is from where they ground it to fit the adjustment screw - I think it caused the high spot?
-
215: Cleaned and oiled.. but..
-
216: It wasn't as advertised - not a 4" vise. Got a 50% refund today.
-
217: Tapping cross slide.
-
218: Finally reassembled.. - Will turn some brass for the cross slide stops tomorrow.
-
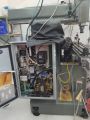
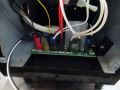
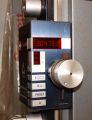
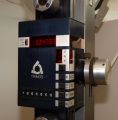
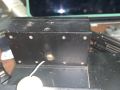
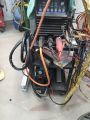
219: Mill control box
-
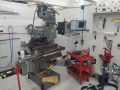
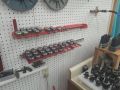
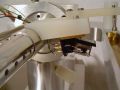
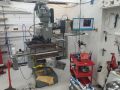
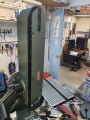
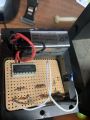
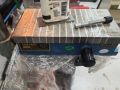
220: Wells - CPU is in the black box on the right with the monitor hanging on.
This has scales on x-y-z operating closed loop and a spindle encoder.
-
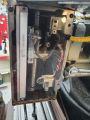
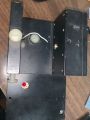
221: Z-axis scale folded into original box.
-
222: 2023-05-26_14-47-24.jpg
-
223: 2023-05-26_14-47-40.jpg
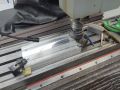
-
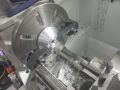
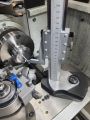
224: Cutting setup for lens crystals
-
225: New lenses turned out well
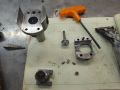
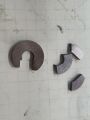
-
226: This one I can't repair - has a mangled gear
-
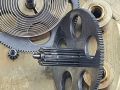
227: This one I can't repair - has a mangled gear
-
228: I was able to fix 3 out of 5
-
229: Processed By eBay with ImageMagick, z1.1.0. ||B2
-
230: Made plastic bumpers - the lathe came with just a bare roll-pin.
-
231: Moved the vacuum tubes to the novelties shelf - most got knocked and broken
-
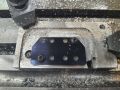
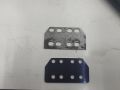
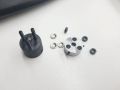
232: Found these - Don't remember where they came from. Tightening the grubscrew spreads the plates.
-
233: Made an end-stop with a M8 bolt with a ball-bearing pressed into the end.
-
234: Milling magnet holes
-
235: Nice flush fit
-
236: Hangs horizontally!
-
237: 2023-06-05_17-47-53.jpg
-
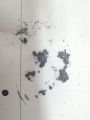
238: redoing the heatsink compound for the new web server
-
239: 2023-06-10_16-05-28.png
-

240: Drive that failed
-
241: Sent wrong indicator
-
242: Trinkets arrived from China
-
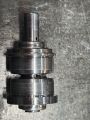
243: Boring head
-
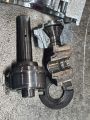
244: Valenite E-Z set
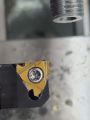
-
245: Valenite E-Z set
Need to identify what insert this holds.
It seems to be pointing down? I think this is the wrong holder in it?
-
246: Server config nightmare
-

247: Tony's birthday party.
-

248: Tony's birthday party - at his place outside of Topeka.
-

249: Tony's birthday party.
Veiw from the pool - beyond the pond is a second pond.
-

250: Tony's birthday party.
-
251: 2023-07-06_14-25-18.jpg
-
252: Art has another repair project for me!
-
253: 2023-07-06_14-25-18_2.jpg
-

254: 2023-07-06_14-25-18_3.jpg
-

255: updating glade on the CNC
-

256: This is really good news - the new OS has even better latency than before.
-

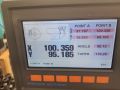
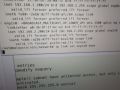
257: Latency with three copies of glxgears running
-
258: Linux CNC engraving metric scale.
-

259: indi-square - needs some TLC..
-
260: indi-square - needs some TLC..
-

261: indi-square - needs some TLC..
-
262: indi-square - needs some TLC..
-
263: indi-square - needs some TLC..
-
264: indi-square - needs some TLC..
-
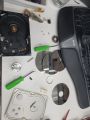
265: Harddrive dissassembly to see the bearing
-
266: harddrive bearing
You can see the tiny machine welding
-
267: harddrive bearing
Sawed into two halves - there is a rubber washer in the middle
-
268: harddrive bearing
There are tiny holes in the very small 3.5mm shaft - these holes intersect a hole that goes through the shaft.
-
269: harddrive bearing
I think it is an air bearing - 7,200 RPM for more than 10 years..
-
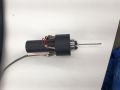
270: Touch-Probe construction -
-
271: Touch-probe - waiting for a couple of last parts.
-
272: 2023-07-15_17-27-43.jpg
-
273: 2023-07-15_18-09-23.jpg
-
274: Made a snug pully on this end
-
275: Welded polyurathane belt..
-
276: 2023-07-16_22-18-10.jpg
-
277: Mike's ex lathe..
-
278: Mike's ex lathe..
-
279: Mike's ex lathe..
-

280: Turned the warped rollers so they are round -
-
281: made a slot in it so I can change the sandpaper with out disassembling everything.
-
282: Still no joy - the stainless steel dowel pins needed a brazed blob to solder - but the rods make poor contacts.
Silver plate or get some brass rods?
-
283: Now with brass dowel pins - works fine!
-
284: M5 thread mill - Note the tips are rounded. One needs to know the diameter IF the tips came out to a point.
-
285: Fixed this with a Chinese M1.6 tip - had to turn a shoulder to extend the thread length.
-
286: Got this nice metric Mitutoyo thread mike - had to steel Anvils from an English PAV micrometer that I want to sell..
-
287: 2023-08-01_16-01-21.jpg
-
288: 2023-08-01_17-53-22.jpeg
-
289: 2023-08-01_17-53-22_1.jpeg
-
290: 2023-08-02_01-51-09.jpeg
-
291: 2023-08-02_01-51-21.jpeg
-
292: 2023-08-02_22-04-40.jpeg
-
293: 2023-08-02_22-04-40_1.jpeg
-
294: Not sure why this was pinned - very hard to disassemble
-
295: needed to make a flate spot
-
296: Drilled for a dowel pin
-
297: Now there is something to measure to and a flat for angles.
Eventually this might become a useful machine.
-
298: Trinkets from China
-
299: Mounted a tray for lathe tool holders.
-
300: Freecad/path - Threadmill interface
-
301: 2023-08-10_22-40-56.jpg
-
302: 2023-08-10_22-41-06.jpg
-
303: 2023-08-10_22-41-08.jpg
-
304: 2023-08-10_22-42-17.jpg
-
305: Lapping machine is working now. Just need to cut off the excess shafts and weld on some 90° legs so I can roll it horizontal. The aluminum plates attach with 3m spray adhesive.
-
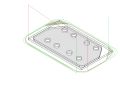
306: Made a black disc out of plexiglass to create marks for monting the magnets.
-
307: Lapping attachment. Magnets go in holes.
-
308: Whistle Notch
-
309: weldon flat on a shank
-

310: Bugle American - need some sort of date?
-

311: Walk to mound at Clinton Lake.
-

312: From left to right :
Coffee, Vanilla, Cinnamon, Ming aralia
-

313: 2023-10-08_18-35-56.jpg
-

314: 2023-10-08_18-38-23.jpg
-

315: From a trail on the south shore where no one goes.
-

316: Sea gulls.
-

317: Wind surfers
-

318: Blue trail..
-

319: Nice hiking trail
-

320: Making the loop
-

321: Panorama
-
322: Not enough clearance for the fly cutter..
-
323: Using a 80mm long 8mm endmill instead
-
324: Turning down a bushing
-
325: This BBQ won't rock any more!
-
326: This BBQ won't rock any more!
-
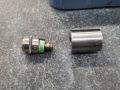
327: Made an adapter (on the right) for Norma.
-

328: Adapter installed.
-
329: Thread is correct - need to turn the seat.
-
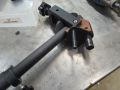
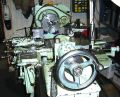
330: Drill grinder attachmet.
-
331: Drill grinder attachmet.
Indicated in to cut grove..
-
332: Drill grinder attachmet.
Grove milled.
-

333: Re did the lapping plate magnet project with bigger magnets.
-
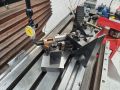
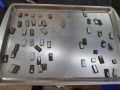
334: Cutting the index plate
-
335: 2023-11-26_20-39-53.jpg
-

336: Tabs worked - narly burs..
-
337: Deburred and adjustable index point for the drill sharpener.
-
338: 2023-11-26_21-06-23.jpg
-
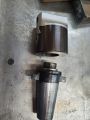
339: Tool holder to boring head - needs a trim for the shoulder.
-
340: Tool holder to boring head - needs a trim for the shoulder.
-
341: Actually well done - the dovetail has a flexture - it is tightened with 3 cone head grub-screws that press on small ball bearings.
-
342: There is some backlash in the adjustment - but I think that is par for the course.
Stuff out of China is still cheap - but quality seems to be going up.
-
343: I put some threads on the oil can spout ( focus never holds still)..
-
344: The aluminum tip is no longer smooth and round - thus does not seal the oil-ball oilers..
-

345: Side project - this tilt table was made for 12mm - just a bit too small for 1/2" clamp hardware.
-
346: The same for the top - widening the slots for 1/2" hardware - (12mm will still work)..
-
347: Found a T-slot cutter in some HSS cutters I picked up years ago on E-bay..
-
348: Lots of cast Iron swarf..
-
349: Another side job - putting in some threaded holes so this can sharpen chisels on the Dekel style D-bit grinder..
-
350: Re did the lapping plate magnet project with bigger magnets.
-
351: Re did the lapping plate magnet project with bigger magnets.
-
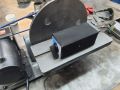
352: Tiny Plasma cutter fits with room to spare on the bottom of the welding cart.
-
353: Measuring to spindle height ..
-
354: Unwrapping my decades old magnetic chuck - magnet seems very weak?
-
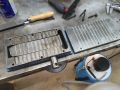
355: I suppose I should disassemble?
-
356: Starting work on the solid tool post.
-
357: Inside of magnetic vice is full of grit - some coroded magnets - some swarf..
-
358: 2023-12-27_16-55-35.jpg
-
359: Magnets are bad - plating corroded off - they need to slide on the bottom of the magnetic table.
-
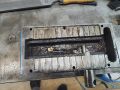
360: In side rusted and rough - will touch up with an end mill.
-
361: The middle shifts so the magnets oppose each other.
-
362: Got the mag-base to use to hold things for lapping.
I need to build a alluminum jig to hold it(non magnetic) so it can slide in - Y - will slide in X via the slot in the table.
-
363: 2023-12-28_21-52-31.jpg
-

364: Anime has an office for me


