Microscope optics must be kept free of dust, fingerprints, etc. to obtain optimum performance. Remove dust by blowing it off with a syringe or brushing it off with a clean camels-hair brush. Dust is often abrasive and, if wiped hard, can damage the optics. Remove fingerprints with a clean soft cloth (a piece of linen that has been washed several times is an excellent cleaner) or a piece of absorbent cotton. Lightly moisten the cloth or the cotton with soap and water and wipe the optics lightly. If this does not remove the fingerprints, used alchohal (or, as a last resort, Xylol) instead of soap and water. A bit of absorbent cotton wound on a tapered stice is useful for cleaning recessed optical surfaces.
Use solvents sparingly and with caution. Solvents, especially when used in excess, can cause run-ins with cemented optics. Flowing solvent can also pick up grease from the mounts and spread it over the optics, requiring additional cleaning.
The following tools and supplies are needed for cleaning the optics:
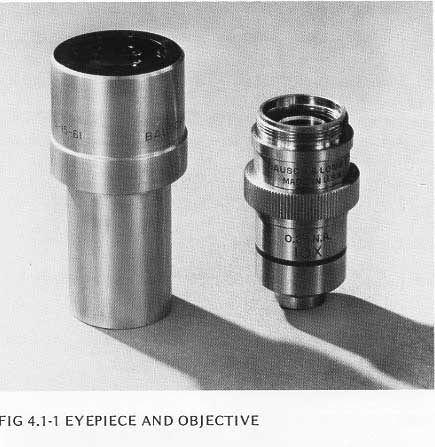
4.1.1 Remove the eyepieces. Clean the upper lens, Figure 4.1-1, using the procedure in section 4.0. Blow the dust off the lower lens.
4.1.2 Remove the top plate from the head mechanism as described in steps 3.5.1 and 3.5.2.
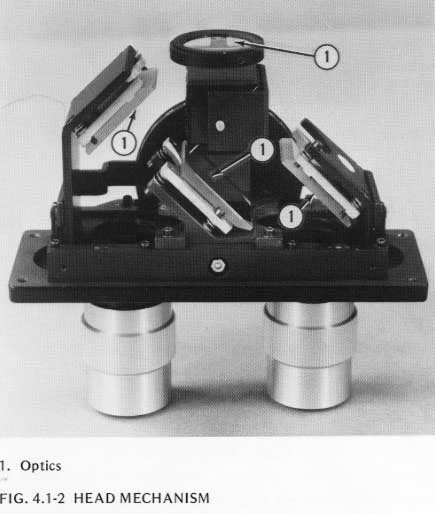
4.1.3 Use the syringe to blow any dust off all exposed optics, Figure 4.1-2. This should adequately clean the head.
4.1.4 If there is a need for additional cleaning, use the general cleaning procedure described in section 4.0.
4.1.5 Reassemble the head.
4.2.1 Unscrew the objectives from the nosepiece.
4.2.2 Blow the dust off the upper lens, Figure 4.1-1, with the syringe.
4.2.3 Clean the lower lens using the procedure in section 4.0.
4.2.4 Replace the objectives on the nosepiece.
4.3.1 Remove the condenser from the substage by pulling it straight out from the stand.
4.3.2 Blow the dust off all exposed optical surfaces, Figure 4.3-1, with
 the syringe.
4.3.3 If additional cleaning is needed, use the procedure in section 4.0.
4.3.4 Replace the condenser by pressing it straight into the substage so the key on the condenser engages the spring-loaded plunger.
4.4.1 This lens is enclosed in the nosepiece and is protected from dust, fingerprints, etc. However, whenever the nosepiece is removed (or the head is removed prividing access to the upper surface of the nosepiece lens), blow the dust off the surface of the lens.
The only cleaning normally required by the illuminator optics is using the syringe to blow the dust off the outer lens surface. If the under surface of the lens needs cleaning, remove the base from the stand (step 3.1.3) to gain access to the dirty surface. Use the cleaning procedure in section 4.0
If the filters used with the base illuminator or condenser are dirty, clean them using the general process in section 4.0
NOTE: When cleaning the neutral density filter, blow off the dust or use soap and water only.
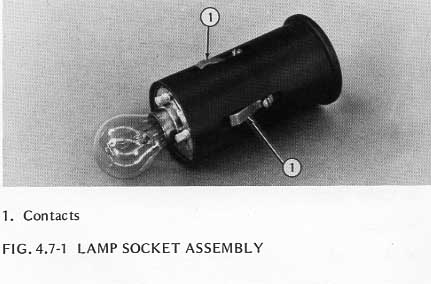
The spring contacts on the removable lamp socket assembly of the High Intensity Base Illuminator should be cleaned occasionally. Pull the socket out from the rear of the base, clean the contacts, Figure 4.7-1, with #2 Emery paper to remove all oxide coatings and privide a clean shiny surface, and replace the socket.
Clean the stage surface with a mild soap and water solution.
CAUTION: Most solvents will remove the finish from the stage
If the exterior of the microscope is dirty, clean it with a soft cloth moistened with chlorothene. Do not use excessive solvent. It might run into the bearings and dilute the lubricant.