This information HAS errors and is made available
WITHOUT ANY WARRANTY OF ANY KIND and without even the
implied warranty of MERCHANTABILITY or FITNESS FOR A
PARTICULAR PURPOSE. It is not permissible to be read by
anyone who has ever met a lawyer or attorney. Use is confined to
Engineers with more than 370 course hours of engineering.
If you see an error contact:
+1(785) 841 3089
inform@xtronics.com
Be gentle - unpacking generally breaks the needle.
What you get is a grimy mess - full of foundry sand - appears they
used - used motor oil for cutting fluid. You get cheap
metal with porosity and voids and rough grinding marks.
Cleaning the sand and grit out is a good idea. A bit of file
work to ease sharp corners is customary. The stand is
worthless - just throw it out - you will need to build a proper
stand. It is hard to understand why they don't finish these
properly - it is made in a low-wage country where a bit more time
spent could make these much more valuable.
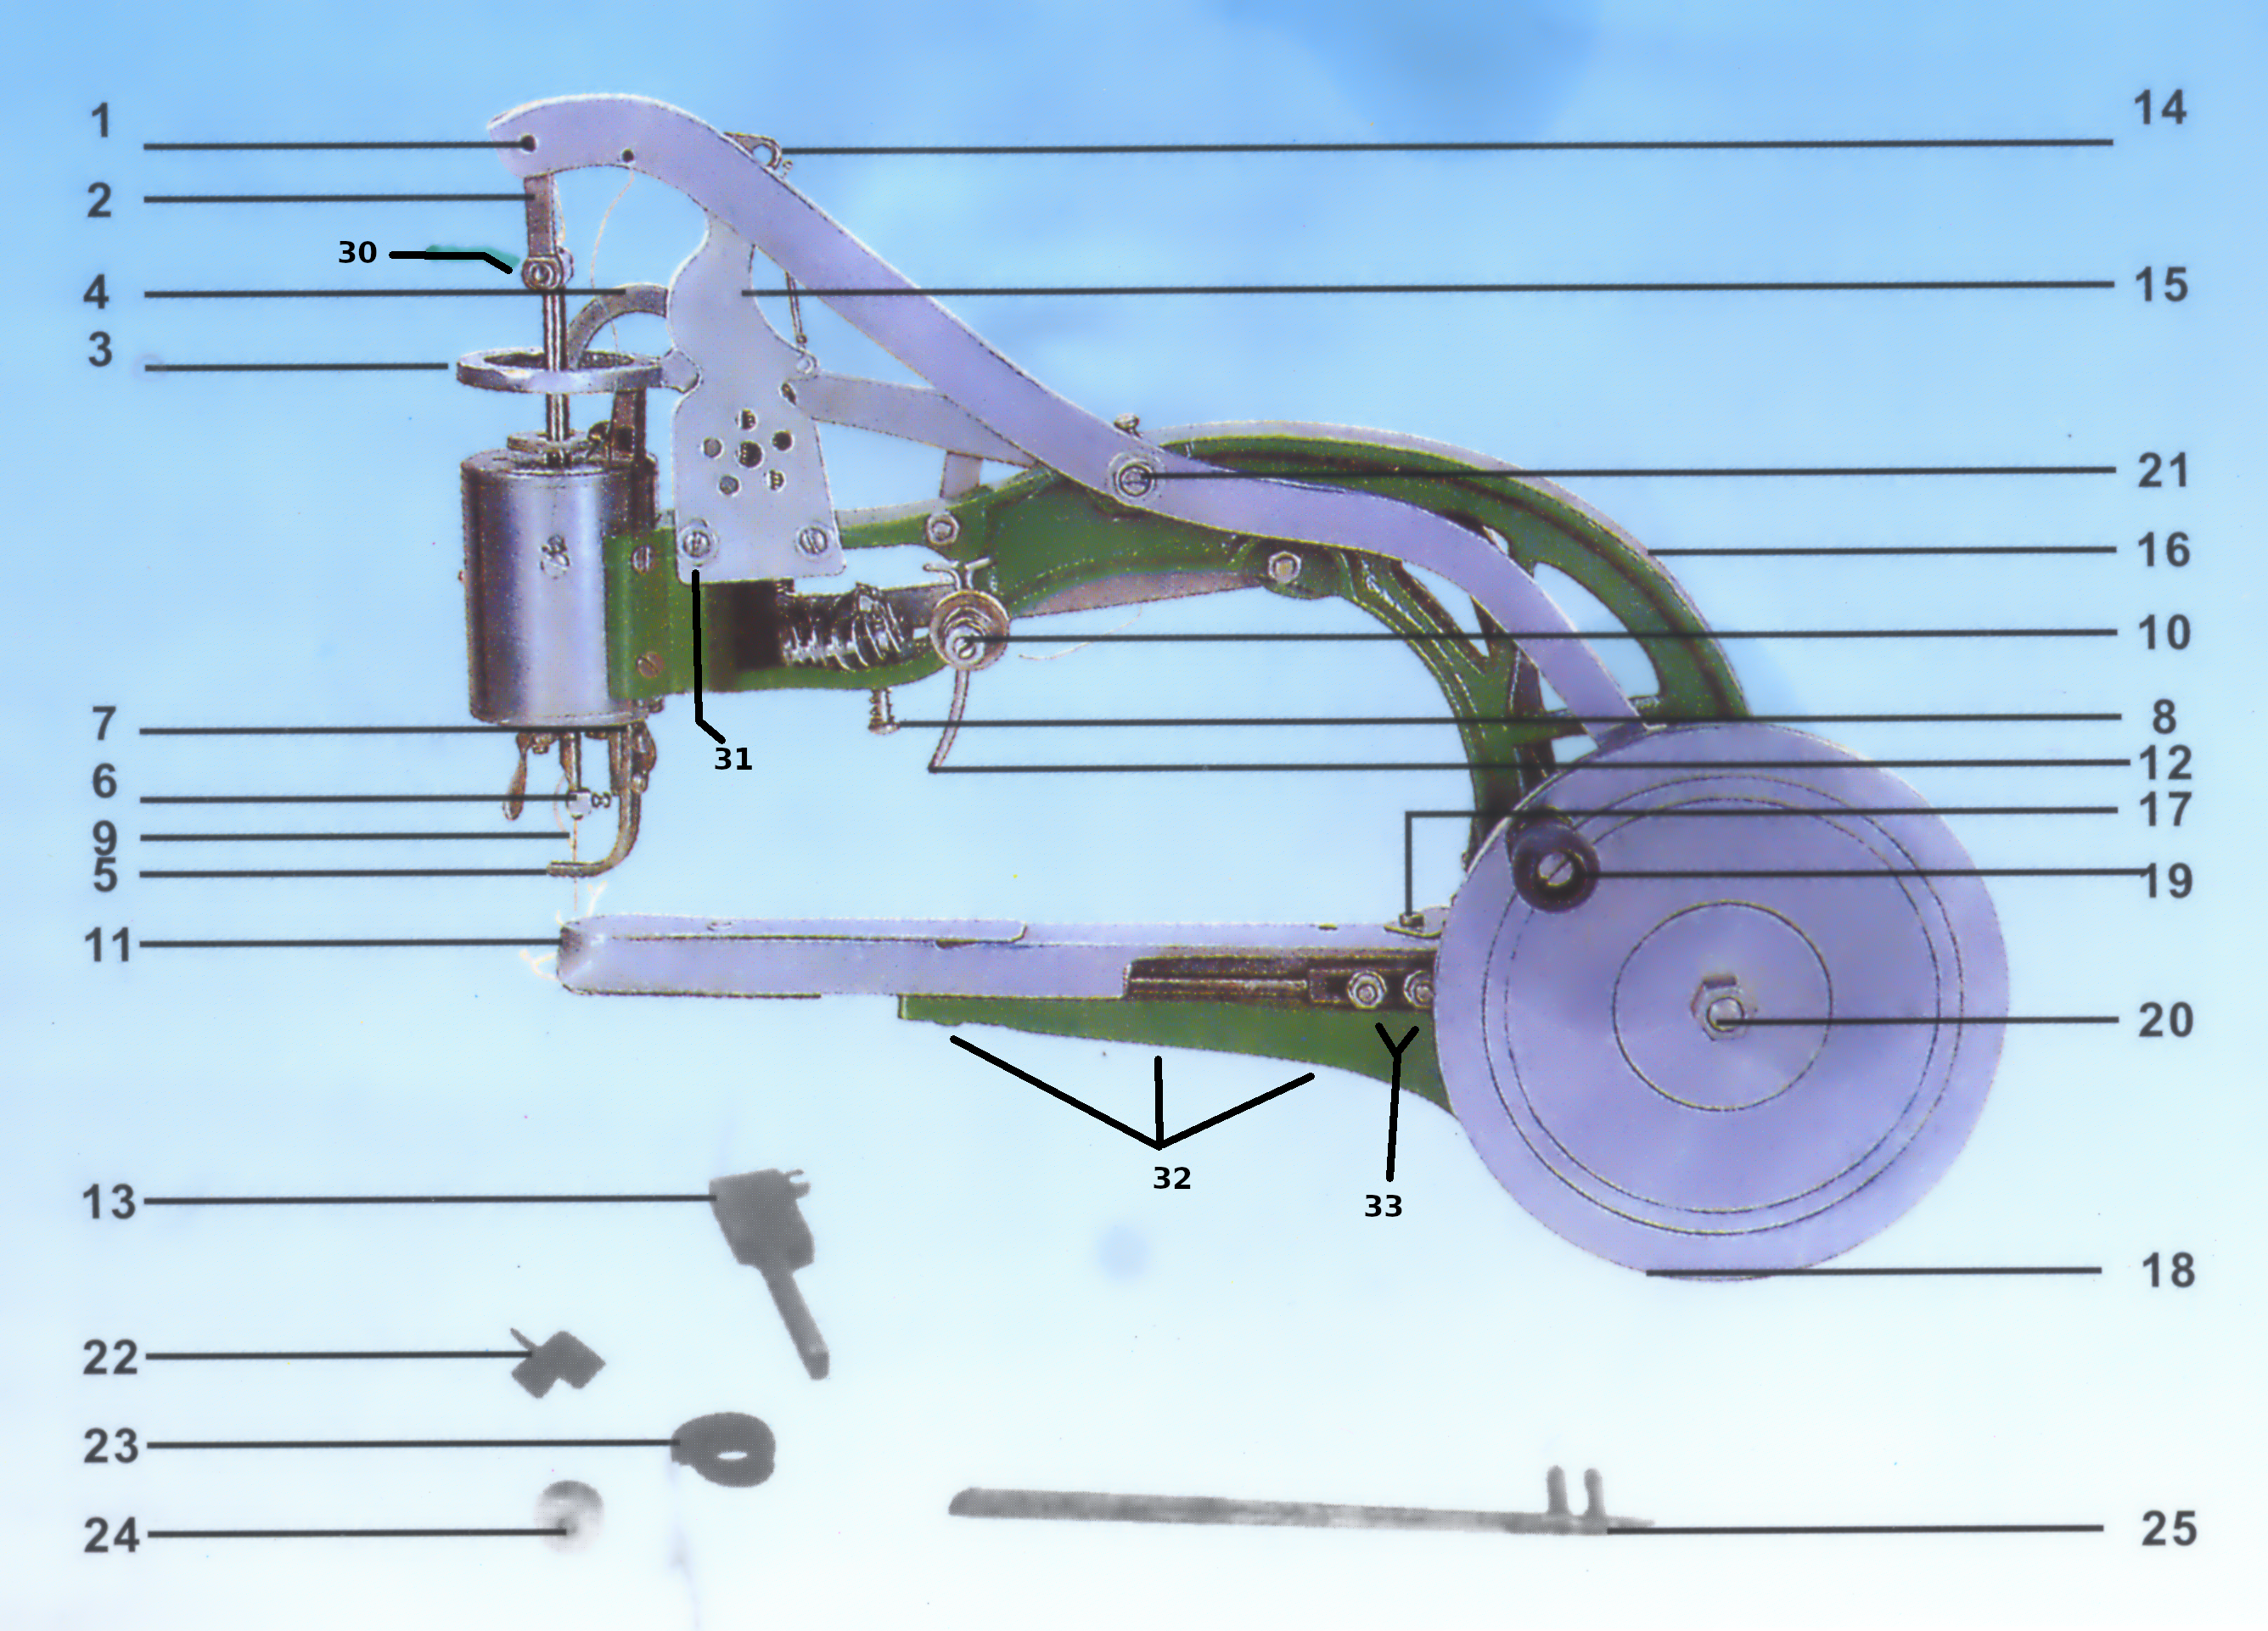
The most common problem is people get the shuttle holder in wrong
- with the crank handle at 12-O'clock the shuttle holder edge that
sticks up should be at 3 O'clock. There are 8 possible
positions - 45° apart.
The shuttle housing bed is held in place with 3 bolts - (32) -
with the top of the shuttle housing open - and the bolts just a
little loose - tap the shuttle housing so the needle almost
touches the shuttle - and the needle is centered. Tighten.
The needle shaft needs to be square to the shuttle bed - even a
couple of degrees will end up with mysterious dropped
stitches. ( You have been warned!) Not all machine arrive
properly square! To get this dead on sight through the
eye-of-the-needle. The shaft also sets the needle height -
put some red sharpie on the dimple where the shuttle hook passes
so you can see it is in the middle when the shuttle hook
passes. This adjustment is fiddly and critical.
The stitch distance should be set for the job. (8)
The pull down force of the walking foot is adjustable (7)
The drive shaft has dimples that should set the timing of the walking foot - should not need to adjust.
The adjustment of the take-up arm base might make a difference -
Fine tuning of the shuttle timing generally isn't needed.
After cleaning you will discover rough surfaces - careful filing followed by sand paper can greatly improve sliding surfaces. Fine sanding of the shuttle and bobbins ( 400 git) followed by a buffing wheel can change things. Disassembly of the round can lets one smooth walking foot motion. Lots of filing, sanding, polishing.
These were built with a lack of care - some of the machined holes are not quite right - every machine will need something different fixed up. Some of the screws are shorter than others - some need to be to get thing to fit.
The rocking arms don't have a proper side bearing - sometimes a
washer helps.
The screws (M5) that hold on the walking foot should be changed to a button head .
The screws that hold the shuttle bed in place should be changed
out to a socket head - there isn't really room for a wrench - an
Allen wrench works well here. The washers don't always clear
- might need to grind it out a bit..
The bottom of the base might have screws that protrude - you will
want to finish the counter-sink so they are flush.
The bottom of the walking foot has sharp edges that need filing. They are sharp enough to cut leather.
The needles that came with this were round - not proper leather needles - you will want to order some. One can adjust things to use different needles with larger thread.
The needle that comes with the machine is a system
130/705 (AKA HAx1 or 15x1) sized 120/19 (up to size 92
thread) with the flatted sided shank. Length dimensions
34.7,38.8 (40mm long 2mm shank fat part of tip 1.3mm) NM 120
= 1.2mm blade 19 = singer number.
It looks like one can use a commercial system
135X17 length dimensions
38.9, 43.8 ( with adjustment of the needle shaft)
Thread size to needle range:
After disassembly and cleaning - sliding surfaces should get a
spot of grease - and oiled regularly. There are oil holes
above the rocking bearing shaft to fill with 20 weight oil
(3-in-one). Even after you totally disassemble, clean, and
rebuild - you will want to use plenty of oil.
| Top Page | wiki Index |